SETTING UP SPEARFISHING RUBBER BANDS
Today we are going to explain how to set up the spearfishing rubber bands. Each day is more important knowing how to it as in the last years the open muzzle, double rubbers, rollers… are much more that in the past.
One of our first doubts use to be the length. Know the exact length and take the maximum power.
RUBBER´S LENGTH
The length or size depends on different factors:
– Distance from the fixation point in the muzzle to the fixation point in the shaft.
– Wishbone´s length
– Each rubber has specific characteristics. So some of them must go more extended (380%) and other ones works better shorter (300%)

14mm rubbers, in the same speargun and same wishbone, will be shorter than a 18mm. And a 18mm hard will be shorter than a 18mm softer, more elastic. So it´s really important know each rubber.
We must apply this ecuation:
It´s: Rubber´s length :(Distance between fixation points (A or B) – Wishbone´s length) / Stretching coefficient
If we are using a circular rubber we must multiply it by 2 (both sides) and we recommend add a couple cm (rubber going across the muzzle) And don´t forget add the part we lost in the knot (around 1-2cm each knot)
SETTING UP THE RUBBER BANDS
Now we know the length of our rubbers. So we are going to proceed to the set up. It´s very easy and when we are used to we can do it quickly.
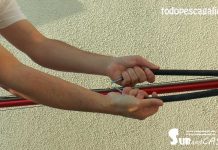
First of all will be give shape to the end of the rubber. We can see it in the video. So we will have a rounded rubber in both ends. It´s mostly aesthetic so we can don´t do that.

Then we are going to decide which rubber we want to set up. With balls and dyneema, metallic wishbone, commando wishbone, M14 adaptor… All this set ups are pretty similar.

Our recommendation is to use good quality stuff. If not we could have problems. Mostly a shorter life and the rubber braking. Sometimes spearfishers blame on the rubber´s quality but it could be bad quality balls.
An example is when people use dyneema knots instead metallic balls. This knots can easy cut the rubber. The pressure when the rubber is loaded is not the same in all points and can damage it. And the dyneema is more rough than a ball with a smooth surface. Plastic balls can have sharp points too. And when we burn the end of the knot, or the dyneema, this sharp shape cut the rubber as a razor when it is loaded.

Our recommendation is good quality metallic balls. In this ones when we finish the knot it goes inside the ball so won´t damage the rubber.
We make the loop with a 1.6mm dyneema without covered. 100% dyneema. And the loop must be as short as possible. As much line we use we will lose rubber length. The same the bridge in the wishbone. As short as we can. It´s a common mistake: too long wishbones.
We must be very careful when we burn the ends. Don´t leave any sharp end which could damage the rubber inside.

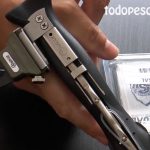
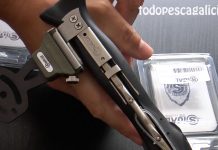
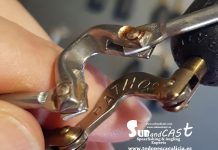
Next step is put the ball inside the rubber. We will use a lubricant. Water based so won´t damage the rubber and will be removed in the water. We will put some lubricant in the rubber where the knot will be. And we can use a tool for the balls as the one you can see in the video and pictures. Will make it easier but you can do it without this tool.

When the ball is inside the rubber we make the knot. We put lubricant too so the line won´t damage the rubber when we close it. We recommend use normal lines. Polyester or similar. The surface is smoother so won´t damage the rubber as much as the dyneema. Dyneema has a rough surface usually. And Polyester and similar are much cheaper.

We adjust the knot at the end of the rubber taking care of not waste it. And make the wishbone as short as possible. And we close it. Pulling too much is not necessary and is not a good idea too as will damage the rubber easier. The balls are big enough to don´t go through the knot without closing it too much. In this link you can see how to do the knot.

When it is done we will cut the ends of the line. Close to the knot, don´t leave too much. And then burn it. You must be careful that the burnt line don´t touch the rubber. Could be sharp and cut the rubber when it is loaded. So the burnt line must be over the knot and never go by the sides. Or be too big.

Now we have the rubber with the loops or a metallic wishbone.
Here is the video:
It is the same if we want to set up a metallic wishbone, an adaptor… You can see it in this link
Now we only need to attach the bridge. It´s very easy. We will use a 2mm dyneema. You can use even more diameter. But must be short.

In this link you have how to do it, step by step.
Simple and fast. So you will have our spearfishing rubber bands ready to use.
Any question leave it in comments or in the forum.
Here is the video:

